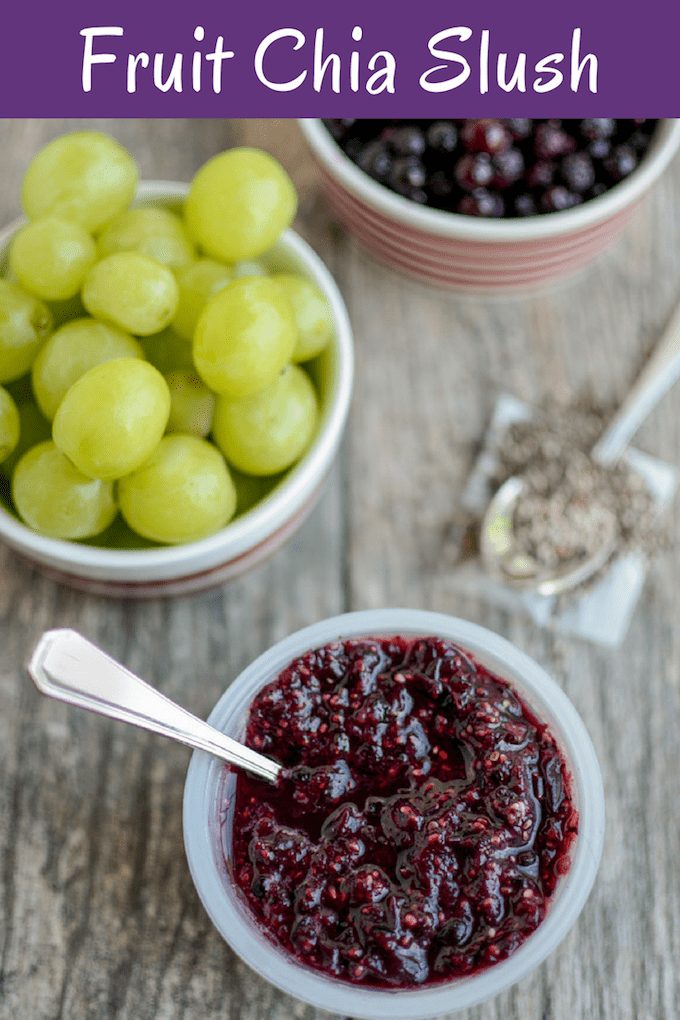
This Fruit Chia Slush is a fun, kid-friendly addition to a lunchbox once school starts! It'll help keep the other food cool and thaw just enough by lunchtime to enjoy as a little treat.
Hi friends!
Welcome to August! I don't know about you, but around here, school starts mid-August which means this mama is officially in countdown mode since our preschool follows the school district calendar. Have I mentioned lately how much we need school structure back in our lives? SO MUCH.
Anyways, even though Squish doesn't need a packed lunch yet, I know a lot of my fellow mamas are gearing up to start packing daily lunches again so I thought I'd throw out this Fruit Chia Slush as a fun alternative to just packing plain old fruit. Not that there's anything wrong with fruit, it's just fun to change things up occasionally!
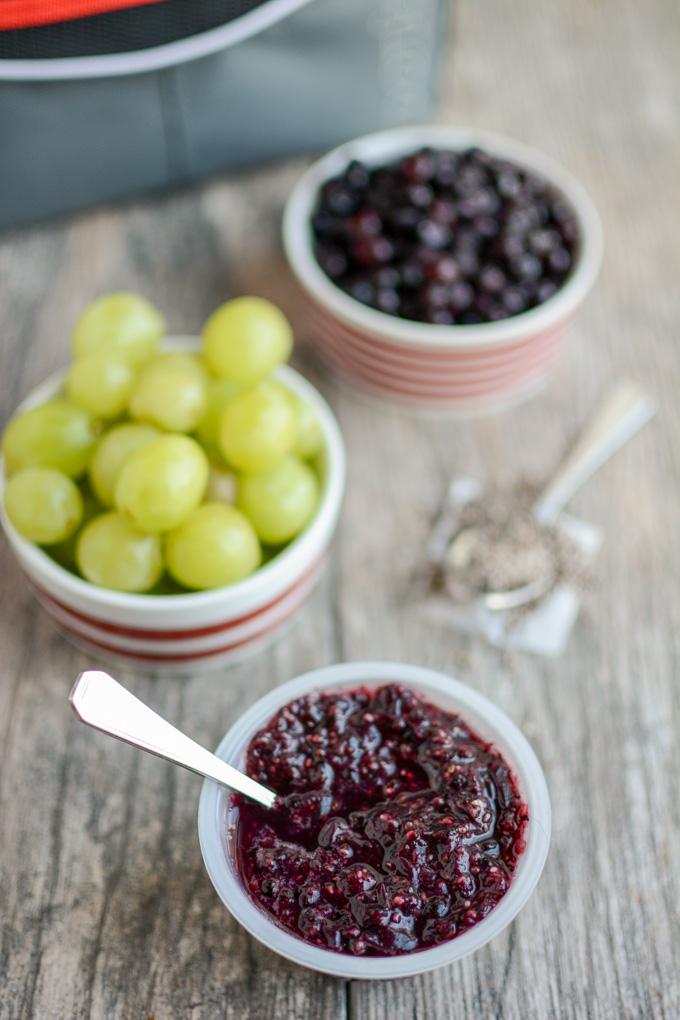
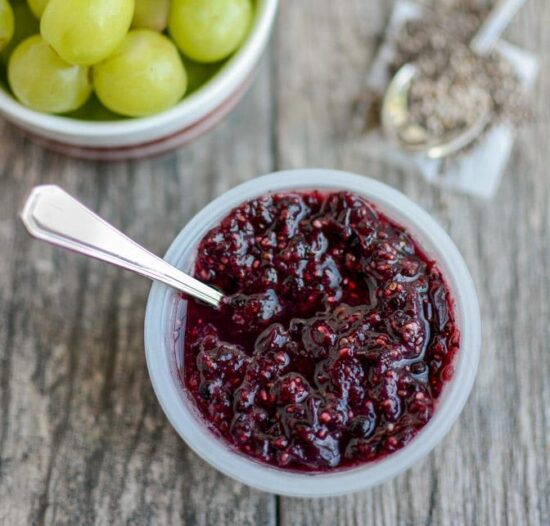
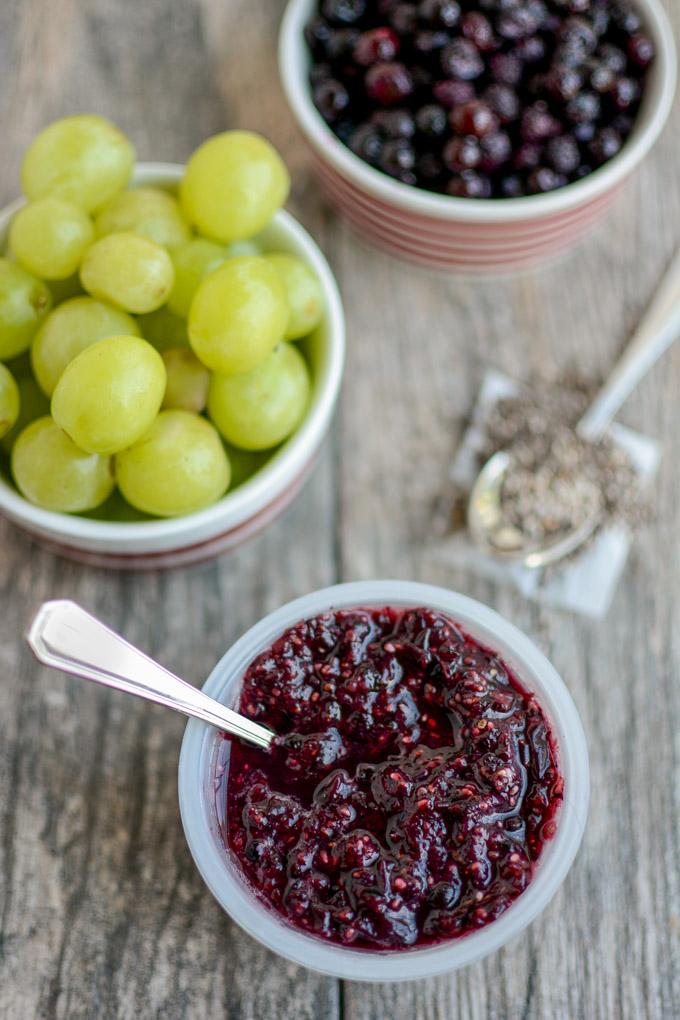
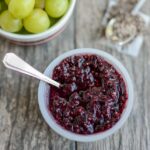
This recipe is super flexible. You can use whatever fruits your kids like – I chose grapes because I like their naturally icy texture when frozen and wild blueberries because they help the chia seeds blend in a little bit! Note- I used red grapes to make these, but green grapes in the photos because no one likes an all purple and red photo!
To put these in the freezer, I saved a bunch of the plastic containers from our Dole peach cups that the kids eat for breakfast and just reused them. I also made some in mason jars since we mostly eat them at home, not at school. Use whatever small containers you have on hand. Yogurt containers would work too. Then I just cover them with foil and make sure they're stored upright in the lunchbox.
If you're eating them at home, just pull them out of the freezer about 45 minutes before you want to eat them. Or stick them in a lunchbox just before you head out the door in the morning. Be sure to pack a sturdy spoon so the kids can chop them up into a slushy treat!
Here's the recipe I used. Remember that you can use your favorite fruits and start with either fresh or frozen fruit. I used fresh grapes and frozen wild blueberries.
Print .tasty-recipes-image { float: right; } .tasty-recipes-print-button { background-color: #666677; display: inline-block; padding-left: 1em; padding-right: 1em; padding-top: 0.5em; padding-bottom: 0.5em; text-decoration: none; } a.tasty-recipes-print-button { color: #FFF; } a.tasty-recipes-print-button:hover { color: #FFF; } .tasty-recipes-rating.tasty-recipes-clip-10 { -webkit-clip-path: polygon(0 0, 10% 0%, 10% 100%, 0% 100%); clip-path: polygon(0 0, 10% 0%, 10% 100%, 0% 100%); } .tasty-recipes-rating.tasty-recipes-clip-20 { -webkit-clip-path: polygon(0 0, 20% 0%, 20% 100%, 0% 100%); clip-path: polygon(0 0, 20% 0%, 20% 100%, 0% 100%); } .tasty-recipes-rating.tasty-recipes-clip-30 { -webkit-clip-path: polygon(0 0, 30% 0%, 30% 100%, 0% 100%); clip-path: polygon(0 0, 30% 0%, 30% 100%, 0% 100%); } .tasty-recipes-rating.tasty-recipes-clip-40 { -webkit-clip-path: polygon(0 0, 40% 0%, 40% 100%, 0% 100%); clip-path: polygon(0 0, 40% 0%, 40% 100%, 0% 100%); } .tasty-recipes-rating.tasty-recipes-clip-50 { -webkit-clip-path: polygon(0 0, 50% 0%, 50% 100%, 0% 100%); clip-path: polygon(0 0, 50% 0%, 50% 100%, 0% 100%); } .tasty-recipes-rating.tasty-recipes-clip-60 { -webkit-clip-path: polygon(0 0, 60% 0%, 60% 100%, 0% 100%); clip-path: polygon(0 0, 60% 0%, 60% 100%, 0% 100%); } .tasty-recipes-rating.tasty-recipes-clip-70 { -webkit-clip-path: polygon(0 0, 70% 0%, 70% 100%, 0% 100%); clip-path: polygon(0 0, 70% 0%, 70% 100%, 0% 100%); } .tasty-recipes-rating.tasty-recipes-clip-80 { -webkit-clip-path: polygon(0 0, 80% 0%, 80% 100%, 0% 100%); clip-path: polygon(0 0, 80% 0%, 80% 100%, 0% 100%); } .tasty-recipes-rating.tasty-recipes-clip-90 { -webkit-clip-path: polygon(0 0, 90% 0%, 90% 100%, 0% 100%); clip-path: polygon(0 0, 90% 0%, 90% 100%, 0% 100%); } .tasty-recipes-nutrition ul { list-style-type: none; margin: 0; padding: 0; } .tasty-recipes-nutrition ul:after { display: block; content: ' '; clear: both; } .tasty-recipes-nutrition li { float: left; margin-right: 1em; } @media print { .tasty-recipes-no-print, .tasty-recipes-no-print * { display: none !important; } } /* Tasty Recipes Elegant recipe card styles */ .tasty-recipes-display { border: 0.15em solid; border-color: #fff; padding: 1.5em; outline: .5em solid #f9f9f9; background: #f9f9f9; margin-bottom: 1em; } .tasty-recipes-display h2 { font-weight: 400; text-transform: uppercase; } .tasty-recipes-print-button { margin-top: 0.5em; margin-right: 0.5em; padding: 0.5em 1em !important; float: right; font-size: .8em; font-weight: 400; border: none; } .tasty-recipes-image { border-left: 1.5em solid; border-color: #f9f9f9; } .tasty-recipes-rating .rating-label { font-size: 0.8em; font-style: italic; } .tasty-recipes-rating p { margin-bottom: 1rem; margin-right: 0.8rem; display: inline-block; } .tasty-recipes-details { font-size: 0.8em; } .tasty-recipes-details ul li { list-style-type: none; display: inline-block; width: 30%; } .tasty-recipes-description p { font-size: .8em; font-style: italic; } .tasty-recipe-ingredients h3, .tasty-recipes-ingredients h3, .tasty-recipe-instructions h3, .tasty-recipes-instructions h3, .tasty-recipes-notes h3 { font-weight: normal; margin-top: 0.6em; margin-bottom: 1.2em; text-transform: uppercase; } .tasty-recipes-notes { margin-bottom: 1rem; } .tasty-recipes-notes h3 { font-size: 1.2em; } .tasty-recipes-notes p, .tasty-recipes-notes ul { font-size: 0.8em; } .tasty-recipes-nutrition h3 { font-size: 1em; text-align: center; margin-top: 1em; } .tasty-recipes-nutrition { padding: 0.5em; border-top: .15em solid #fff; } .tasty-recipes-nutrition ul { text-align: center; } .tasty-recipes-nutrition ul li { list-style-type: none; font-size: 0.8em; margin-left: 0; width: 30%; } .tasty-recipes-keywords p { font-size: .8em; margin-top: 1em; margin-bottom: 1em; } .tasty-recipes-entry-footer { text-align: center; padding-top: 1rem; } .tasty-recipes-entry-footer p { margin-bottom: 0; } .tasty-recipes-print-view { font-size: 11px; }
Fruit Chia Slush
This Fruit Chia Slush is a fun, kid-friendly addition to a lunchbox once school starts! It'll help keep the other food cool and thaw just enough by lunchtime to enjoy as a little treat.
- Author: Lindsay
- Prep Time: 5 min
- Total Time: 5 min
- Yield: makes approx 4 (1/4 cup) servings
Ingredients
1.5 cups grapes (I used red)
1 cup frozen wild blueberries
2-3 Tbsp chia seeds
Instructions
Combine ingredients in a blender and mix until well combined. (If needed, add 1-2 Tbsp water to get the blending started).
Pour into small cups and freeze. Use a spatula to scrape down the sides of the blender and get all those chia seeds! I use plastic fruit cups and portion into approximately 1/4 cup servings.
Set on counter 45 minutes before eating or pack in a lunch box. (Cover container with foil)
Notes
Feel free to use whatever fruit you'd like and experiment with the amount of chia seeds you like.
Pretty easy, right??
Let me know if you try this recipe!
Enjoy!
–Lindsay–


Original Content:
Fruit Chia Slush
No comments:
Post a Comment